DIY Water Damage Restoration Tips for Homeowners
Homeowners facing water damage often feel overwhelmed about where to start. Water damage from burst pipes, roof leaks, or natural disasters can lead to mold, structural deterioration, and costly repairs if not promptly addressed. This article provides comprehensive DIY water damage restoration tips—from initial assessment and water extraction to effective cleaning and long-term prevention measures. In some cases, additional services such as fire damage restoration may be required to address related hazards after an incident. By following expert advice and using the proper tools and techniques, property owners can reduce further damage, ensure a safer living environment, and lower repair costs. The guide also explains when to seek professional help—if needed, feel free to contact-us—and recommends key products for the restoration process.
The following sections outline the essential steps to take immediately after water damage, how to safely remove water and dry affected areas, cleaning tips to prevent mold, evaluation of damaged materials, necessary safety precautions, recommended products, and maintenance tips to ward off future water damage.
Transitioning now to detailed, expert-based directives for managing water emergencies effectively.
What Are the First Steps to Take After Water Damage Occurs?
Immediately following water damage, safety is the first priority. Ensure all occupants are safe and away from hazards. Inspect the property before beginning any restoration work. Critical initial actions include checking for electrical issues and shutting off utilities if necessary. If water has reached electrical wiring or appliances, turn off the main power supply and water supply to prevent electrical shock, fire hazards, or additional water intrusion. Contact a certified electrician as soon as it is safe to restore power.
How Do You Assess the Extent of Water Damage?
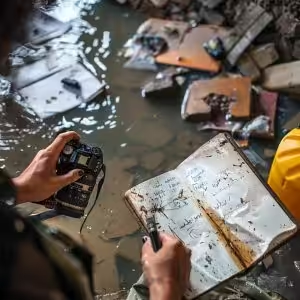
Begin with a thorough visual and physical inspection. Look for signs like soaking, discoloration, buckled floors, and warped walls. Document the damage with photographs and notes for insurance or professional evaluations. Check not only the obvious areas but also hidden spaces—behind walls, under carpets, and beneath flooring. Tools like moisture meters or infrared cameras can help detect water that is not visible to the naked eye. Systematically inspect rooms, paying close attention to areas near bathrooms, kitchens, and basements. An accurate assessment helps plan remediation efforts and decide if professional services are needed.
When Should You Turn Off Utilities to Prevent Further Damage?
Utility safety is critical. Immediately shut off the main power if water is near wiring or electrical outlets, and turn off the water supply if the damage results from burst pipes or appliance failure. This step helps stop ongoing leaks and prevents additional water exposure. Consulting a professional electrician is advisable before restoring power, as water may have compromised wiring and insulation.
What Tools and Supplies Are Essential for Initial Cleanup?
Key equipment includes: • Wet/dry vacuums, mops, and buckets for water extraction • Personal protective equipment (PPE) such as gloves, boots, and masks • Cleaning supplies like disinfectants, detergents, and absorbents (e.g., silica gel packs) • Fans and dehumidifiers to accelerate drying
Using these tools correctly limits further damage and protects residents while initiating the restoration process.
How Can Homeowners Safely Remove Water and Dry Affected Areas?
After ensuring safety and securing utilities, the next priority is to remove standing water and dry all wet surfaces to prevent additional damage like mold or structural weakening.
What Are the Best Methods for Water Extraction at Home?
For minor water accumulation, manual methods such as mopping, towel drying, and using buckets may work. For larger volumes, a wet/dry vacuum is more efficient in extracting water quickly. In extensive cases, renting a water pump might be necessary for areas like basements or crawl spaces. For persistent water, consider water damage restoration designed to handle heavy flows. Following safety guidelines when using electrical extraction tools is essential to avoid electrical shock.
How Do Dehumidifiers and Fans Help in Drying?
Dehumidifiers remove moisture from the air, lowering humidity and speeding up the drying of walls, floors, and furniture. Fans assist by circulating air across damp surfaces, promoting faster evaporation. Using multiple air movers and monitoring humidity with a hygrometer ensures that moisture levels drop to a safe level (typically below 50%). For best results, operate dehumidifiers and fans continuously for at least 48 to 72 hours to achieve complete dryness.
How Long Does It Take to Fully Dry Water-Damaged Areas?
Drying time depends on the extent of damage, type of materials, and environmental conditions. Initial drying might take 24 to 48 hours, but complete drying of porous materials (like drywall, insulation, and carpeting) can take several days to a week or more. Using moisture meters to track progress is advisable since rushing the process may leave hidden moisture pockets that promote mold growth. For more information on the restoration process, visit home damage restoration.
What Are Effective DIY Cleaning and Mold Prevention Tips After Water Damage?
Once water removal and drying are complete, thorough cleaning is crucial. Effective cleaning not only restores the appearance of surfaces but also minimizes health risks from mold and contaminants.
How Do You Clean and Disinfect Water-Damaged Surfaces?
Start by disinfecting all affected areas. Mix a mild detergent or a commercial disinfectant with water, and scrub surfaces diligently to remove debris and contaminants, then rinse with clean water. Pay extra attention to walls, floors, and baseboards, which are prone to bacterial growth after prolonged exposure. For carpets and upholstery, consider professional carpet or steam cleaning if contaminants have penetrated deeply.
A multi-step cleaning process is recommended: 1. Remove loose debris with a vacuum or broom. 2. Mop hard surfaces with a disinfecting solution. 3. For porous materials, use specialized cleaning agents. 4. Ensure all areas are thoroughly cleaned and allowed to dry completely before further restoration work.
What Are the Signs of Mold Growth to Watch For?
Watch for a musty odor, discoloration on walls or ceilings, or fuzzy growth that indicates mold. Even slight staining or a damp feeling can signal mold formation, especially if humidity remains above 60%. Regular inspections using mold testing kits and moisture meters help catch early signs, enabling prompt treatment before mold takes hold.
How Can You Prevent Mold From Developing After Water Damage?
Key preventive measures include: • Ensuring all surfaces are completely dried using dehumidifiers and fans • Applying mold-resistant primers and sealants to walls and ceilings • Removing and replacing heavily infested or waterlogged materials like carpets, drywall, and insulation • Maintaining proper ventilation by opening windows or using exhaust fans • Routinely cleaning areas prone to moisture with mold-preventative solutions
These steps reduce the chance of mold growth and preserve both indoor air quality and structural integrity.
Which Common Household Materials Can Be Restored and Which Should Be Discarded?
Deciding whether to restore or discard water-damaged items is critical to ensure both air quality and structural safety.
How Do You Salvage Water-Damaged Carpets and Upholstery?
If the water damage involves “clean water” (non-sewage), carpets and upholstery may be saved through prompt and professional cleaning. The process involves extracting excess water, thoroughly drying using industrial fans and dehumidifiers, and deep cleaning with appropriate detergents. However, if deep-seated moisture persists or a musty odor remains, replacement is usually the safer option. Generally, if more than 50% of the material is saturated or visibly degraded, removal and replacement are recommended to avoid long-term issues.
When Is It Necessary to Replace Drywall and Insulation?
Drywall and insulation easily absorb water and can lose structural integrity. For minor exposure, drying and disinfecting might suffice, but if materials are heavily soaked, sagging, or discolored, replacement is the best course. Persistent damp spots, a strong musty smell, or visible mold are clear indicators that replacement is necessary to prevent hidden mold growth and structural deterioration.
What Are Safe Disposal Practices for Water-Damaged Items?
Safely disposing of water-damaged items prevents the spread of contaminants. Follow local regulations when disposing of hazardous materials like mold-infested drywall, insulation, or heavily saturated carpets. Typically, these items should be double-bagged and disposed of according to local guidelines. Always use PPE such as gloves, masks, and eye protection during disposal, and consider professional services for safe removal when necessary.
What Safety Precautions Should Homeowners Follow During DIY Water Damage Restoration?
DIY water damage restoration can be risky if safety precautions are not followed. Taking the right measures protects against injuries, electrical hazards, and exposure to contaminants and mold spores.
How Do You Protect Yourself From Electrical Hazards?
Electricity and water do not mix. If water reaches electrical outlets, wiring, or appliances: • Immediately turn off the main power supply. • Use a non-contact voltage tester to ensure no active current is present near wet areas. • Consult a professional electrician before restarting power to address potential wiring damage.
What Personal Protective Equipment (PPE) Is Recommended?
Essential PPE includes: • Waterproof gloves and rubber boots • Safety goggles and N95 respirators • Disposable coveralls to avoid spreading contaminants Using and cleaning PPE properly reduces the risk of skin contact with contaminated water and inhaling hazardous mold particles.
When Should You Call a Professional Instead of DIY?
While DIY methods can work for minor damage, call a professional if: • Water damage is extensive or involves sewage • There are significant electrical or structural risks • Hidden mold growth is suspected in load-bearing walls or subfloors Professional restoration services bring advanced equipment and expertise to ensure a safe, comprehensive restoration.
Which Products and Tools Are Recommended for DIY Water Damage Restoration?
Selecting the right tools is critical for effective restoration. The following products are recommended based on performance, ease of use, and cost-effectiveness.
What Are the Best Dehumidifiers and Air Movers for Home Use?
Choose dehumidifiers with digital controls for precise humidity regulation and models rated for your room size. Air movers or fans with high cubic feet per minute (CFM) ratings are ideal for large areas, while quieter models work best in residential settings. Energy-efficiency and user-friendly controls enhance the drying process without excessive power use.
Which Cleaning Solutions Are Effective and Safe?
Effective cleaning solutions include: • A household bleach solution (diluted appropriately) • Commercial disinfectants proven to kill mold and bacteria • Eco-friendly, biodegradable products as alternatives Always follow manufacturer guidelines on dilution and application to ensure safety and effectiveness.
Are There Affordable Restoration Kits for Homeowners?
Restoration kits that bundle a wet/dry vacuum, dehumidifier, fans, cleaning agents, and PPE are excellent for minor to moderate water damage. These kits simplify the process and are available through home improvement retailers and online platforms. For severe damage, professional-grade equipment might be needed.
Below is a summary table of key products:
| Product Type | Key Feature | Advantage | Typical Cost Range |
|---|---|---|---|
| Dehumidifier | Digital humidity control | Efficient moisture extraction | $200 – $600 |
| Air Mover/Fan | High CFM rating | Fast drying capability | $50 – $200 |
| Wet/Dry Vacuum | Powerful suction | Quick water extraction | $100 – $300 |
| Cleaning Disinfectant | Mold and bacteria elimination | Safe for various surfaces | $20 – $50 per gallon |
| Restoration Kit | Bundled essential tools | Comprehensive and cost-effective | $300 – $800 |
This table helps homeowners compare options and select the best tools for their restoration needs.
How Can Homeowners Maintain Their Property to Prevent Future Water Damage?
After immediate restoration, long-term maintenance is key to preventing future water damage. Regular inspections and timely repairs reduce the risk of water intrusion, mold growth, and structural issues.
What Regular Maintenance Tasks Reduce Water Damage Risk?
Essential maintenance tasks include: • Inspecting and cleaning roofs, gutters, and downspouts to ensure proper water diversion • Clearing debris and sealing gaps or cracks in exterior walls • Conducting periodic waterproofing of walls and foundations • Regularly checking plumbing for leaks and ensuring shutoff valves work properly
A scheduled maintenance routine helps identify small issues before they turn into major problems.
How Do You Inspect and Repair Common Water Entry Points?
Frequent inspections should target vulnerable areas such as basements, bathrooms, and kitchens. Look for signs of leaks around windows, doors, and showers, as well as deterioration in roofing materials. Prompt repairs using waterproof caulk, sealants, and replacement flashing are critical. Documenting repairs as part of routine maintenance can help track recurring issues.
When Should You Consider Installing Water Detection Devices?
Installing water detection or leak alarms in key areas like bathrooms, basements, and near appliances offers early warnings of water intrusion. These devices monitor moisture levels and send alerts, enabling homeowners to act before damage worsens. Integrating them with home automation systems adds an extra layer of security, especially when away from home.
Final Thoughts
In summary, effective DIY water damage restoration relies on prompt action, proper water extraction, thorough drying, and meticulous cleaning. Homeowners should carefully assess and document damage, use the right tools and PPE, and know when to call in professionals to prevent long-term problems. Evaluating which materials can be salvaged or must be replaced is also crucial for maintaining both safety and property integrity. Finally, ongoing maintenance and timely inspections are key to preventing future water-related issues and safeguarding your investment.
Frequently Asked Questions
Q: How quickly should water damage be addressed?A: Address water damage within 24 to 48 hours to prevent mold growth and structural issues. Quick extraction and thorough drying reduce repair costs.
Q: Can DIY methods fully restore water-damaged areas?A: DIY methods work for minor to moderate damage, but severe cases with extensive mold or structural risks often require professional intervention.
Q: What are the health risks associated with mold after water damage?A: Mold can cause respiratory problems, allergic reactions, and other health issues, especially for those with pre-existing conditions. Proper drying and disinfection are crucial.
Q: Which areas of the home are most vulnerable to water damage?A: Basements, bathrooms, kitchens, and areas around windows and doors are most at risk. Regular inspections and maintenance help prevent significant damage.
Q: How do water detection devices help in preventing future damage?A: These devices monitor moisture levels and send alerts if a leak is detected, allowing homeowners to address issues before they escalate.
Q: What should I do if electrical appliances are wet during water damage?A: Disconnect wet appliances immediately and have them inspected by a professional before reuse to prevent electrical hazards.
Q: Are restoration kits effective for DIY projects?A: Yes, restoration kits that include dehumidifiers, wet/dry vacuums, and cleaning solutions are effective for minor damage, but severe cases may need professional-grade equipment.